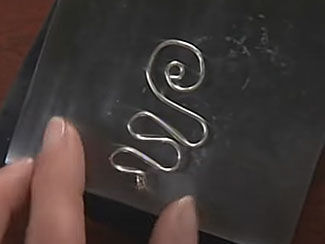
Forming Complex Wire Shapes

by Sandra Lupo, Metalsmith, Jewelry Designer and Instructor
Exclusively for Fire Mountain Gems and Beads®
A72Z

American sculptor, Alexander Calder (1898-1976) has been a great inspiration to many wireworking jewelry makers. His large-scale wire jewelry becomes complex when combined with other wire types, styles and shapes and varying materials. He has shown us that wire can be wearable as well as sculptural with his fibula designs, the concept from which this pendant design is derived.

With a few pieces of wire and the right tools, you can realize his style of wearable art on a smaller scale. The pendant is formed from one or two continuous pieces of wire. Embellishments may be added. Calder tended to make large pieces with little embellishment. Be inspired and take it where you'd like.

STEP 1
Using flush-cutters, cut a 12-inch length of 14-gauge sterling silver dead-soft round wire. Use a needle file to smooth both ends of the wire. Using round-nose pliers, form a large circle at the end of the wire.

Continue to spiral the wire with a pair of flat-nose pliers or nylon-jaw pliers.
STEP 2
Place the wire against the 8mm or 9mm barrel of a jumpring mandrel. Shape the wire over the curve of the barrel, forming fluid curves, working the wire back and forth over the spiral base.

Tip: Smaller barrels will render more slender curves.

Note: Check the available length of wire as you form the curves. Form at least 3 curves of varying diameters with this length of 14-gauge wire. Leave enough straight wire to be able to form a bail.
STEP 3
Use the tip of the chain-nose pliers to form a sharp right angle on the straight wire past the last curve. This will bring the remaining wire into position to be formed as the bail.

Place the 7mm barrel of the jumpring mandrel against the straight length of wire and begin to wrap it, forming coils for a bail that will accommodate a wide tubular cord.

Tip: Use the 4mm barrel of a jumpring mandrel if you want a bail that will pass over a strand of beads.
STEP 4
Place the pendant on the steel bench block. Using the side of a ball peen hammer, hammer the spiral and the curves to create dimension and texture.
STEP 5
Oxidize the piece with liver of sulfur or other antiquing solution suitable for sterling silver and/or copper. (Optional)
STEP 6
Polish the pendant with a polishing cloth or place it in a tumbler with stainless steel shot to harden and polish. (Optional)

Optional Design

Give additional color and complexity to the design with a contrasting wire.
STEP 7
Using the flush-cutters, cut a few inches of 18-gauge gold-filled half-round dead-soft wire.

Wrap or bracket the curves with half-round wire where the curving wire meets itself. Use flat-nose or chain-nose pliers to create and compress a few brackets in each place.

: : : Additional Resources : : :


Have a question regarding this project? Email Customer Service.

Copyright Permissions

Permission to copy this instruction sheet is granted for non-commercial educational purposes only. All other reproduction requires written permission. Please email copyrightpermission@firemtn.com for more information.

Wireworking How-To Videos View All