How to Create 3 Different St. Petersburg Stitches


Instructions
The St. Petersburg Stitch
Note: A wide variety of bead combinations can be used in this stitch. The instructions were created using size 8 (A bead) and size 11 (B bead) rocailles.

Follow along as jewelry designer Rose illustrates how to create with the double St. Petersburg stitch. This decorative stitch is ideal for timeless designs or more modern pieces and is easy to make with this close-up, step-by-step demonstration.
Step 1
Cut a 3-foot length of stringing material and thread a beading needle.
Step 2
String a stop bead, leaving a 4-inch tail.
Step 3
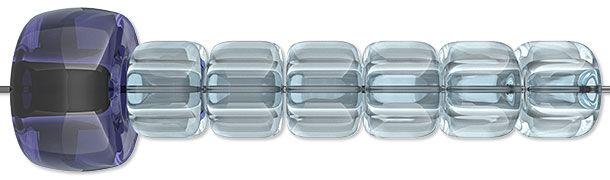
Pick up one A bead and six B beads.
Step 4
Pass through the third and fourth B beads added in Step 3 again. Pull the thread tight to create a square of beads.
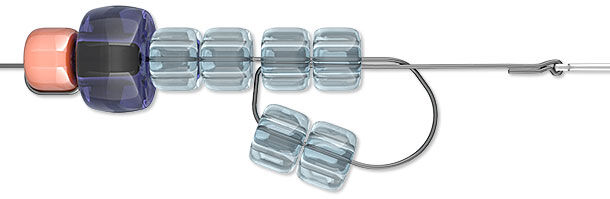
Step 5

Pick up one B bead, then pass back through the last three B beads in the row.
This completes row one, leaving the two lower B beads of the square to begin row two.
Step 6

Pick up one A bead and pass through the two B beads of row two.
Step 7
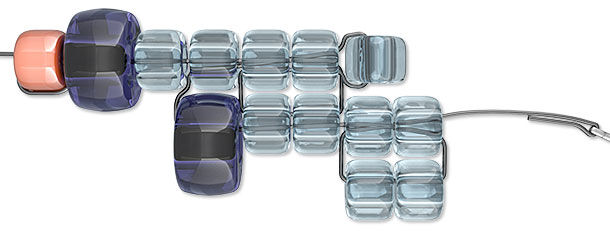
Pick up four B beads. Pass through the first two B beads again, pulling tight to create a square.
Step 8

Repeat Steps 5 - 7 until the St. Petersburg stitch reaches the desired length.
Step 9
Weave through adjacent beads to secure the thread. For additional security add a knot.
Remove the stop bead and thread the beading needle onto the tail created in Step 2. Pass through multiple adjacent beads to secure the thread. For additional security add a knot.
The Double St. Petersburg Stitch

With just a few beads, some thread and a little patience, you can master the Double St. Petersburg stitch! Transform your St. Petersburg-stitched jewelry into double-sided masterpieces with this step-by-step tutorial featuring jewelry-making expert Rose.
Note: A wide variety of bead combinations can be used in this stitch. The instructions were created using size 8 (A bead) and size 11 (B bead) rocailles.
Step 1

Create a length of St. Petersburg stitch. Secure the working thread and do not remove the stop bead.
Note: View "How to Create the St. Petersburg Stitch" illustrated instructions for additional details.
Step 2
Cut a 3-foot length of stringing material and thread a needle, leaving a tail.
Step 3

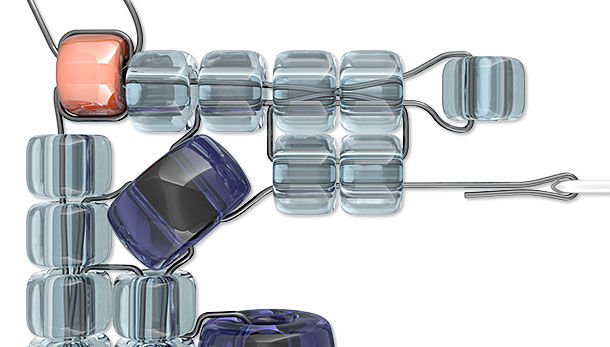
Pass through the stop bead of the St. Petersburg stitch twice, pulling tight, then pick up six color B beads.
Step 4
Pass through the third and fourth color B added in Step 3 again, then pull tight to create a square of beads.
Step 5

Pick up one color B bead then pass back through the last three color B in the row.
This completes row one, leaving the lower two color B of the square to begin row two.
Step 6
Pass through the adjacent color A from the original St. Petersburg stitch and the two color B of row two.
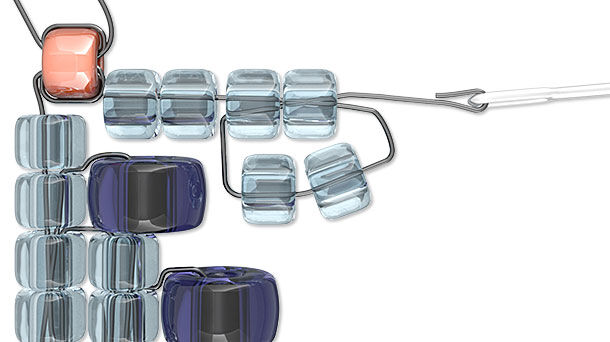
Step 7
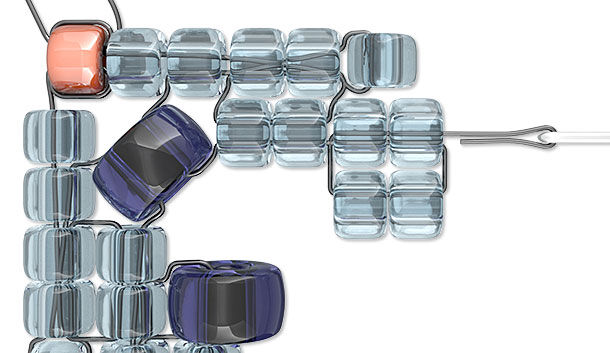
Pick up four color B. Pass through the first two beads picked up again, pulling tight to create a square.
Step 8
Repeat Steps 5 - 7 until the length matches the original St. Petersburg stitch.
Step 9
Weave through adjacent beads to secure the thread. For additional security add a knot.
Remove the stop bead and thread the beading needle onto the tail, then repeat to secure the thread. Repeat to secure the second tail.
The St. Petersburg Chain Stitch
Step 1
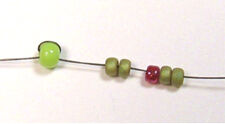
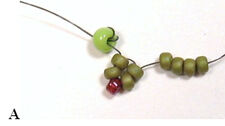
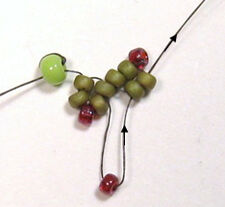
String on a tension bead (for which I've used a light green size 8). String 2 olive beads, 1 berry bead, and 2 olive beads.
Step 2
Pass through all 4 of the olive beads again, skipping the berry bead altogether. This creates a square of beads with a little picot at one end.
Step 3
String 4 olive beads (A).
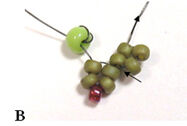
Pass through the first 2 beads just strung, making sure this little square of beads is snug to the other beadwork (B).
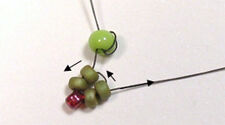
Step 4
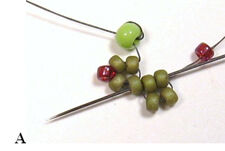
String 1 berry bead.
Pass back through the last 2 olive beads just exited, plus one more (A); pull tight (B).
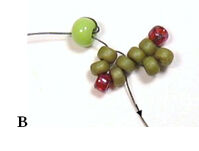
Step 5
String 1 berry bead; pass through the third and fourth olive beads added in Step 3, then pull tight.
Step 6
Repeat Steps 3 - 5 to desired length.
Shop for Your Materials Here:


Have a question regarding this project? Email Customer Service.
Copyright Permissions
All works of authorship (articles, videos, tutorials and other creative works) are from the Fire Mountain Gems and Beads® Collection, and permission to copy is granted for non-commercial educational purposes only. All other reproduction requires written permission. For more information, please email copyrightpermission@firemtn.com.