Beginner's Guide to Loomwork

Welcome to the enchanting world of loomwork! This guide is your first step on a journey filled with colorful threads and endless possibilities. Imagine creating beautiful bracelets, hat bands, belts and more with a square of shimmering seed beads. That's the beauty of a beading loom. It weaves threads into stunning designs, each bead a pixel in your artistic vision.
Let's dive into the magic of this craft, starting with the heart of loomwork: the loom itself.
Choosing Your Loom
The first step is to select your loom. Here at Fire Mountain, we sell two types of looms:
- Beading Loom: Compact and user-friendly, this loom is specially designed for weaving intricate beaded designs up to 10 inches, making it perfect for creating stunning seed bead patterns
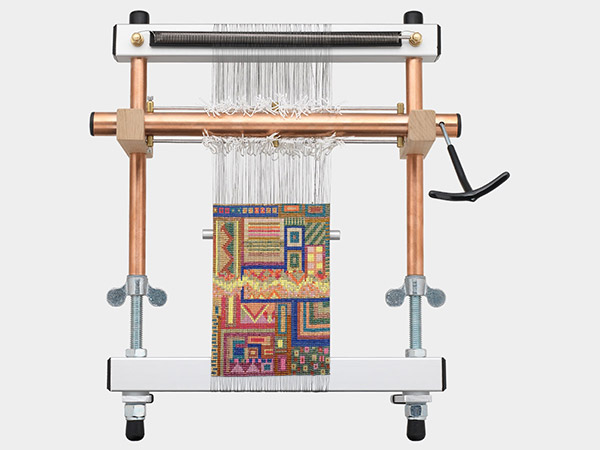
- Weaving Loom: Perfect for weaving designs ranging from 22 to 40 inches, ideal for larger projects
For beginners, the beading loom is a fantastic choice, being a simple gateway into the realm of loomwork.
The Beading Loom Comparison Chart
This comparison chart lays out everything you need to know about beading looms.
- Size: Compact and portable, perfect for smaller workspaces
- Construction: Choose from wood, plastic or metal frames with durable parts
- Weaving Surface: The maximum area for your creative expression
- Maximum Weaving Width: The number of slots for your lengthwise threads
- Benefit: The feature or features that tell what each loom has to offer and distinguish one beading loom from another
| Loom | Size |
Construction
Bold = primary material |
Weaving surface | Maximum weave width | Benefit |
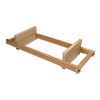
Wood frame loom |
12-1/2 x 5 inches | Wood |
7-3/4 inches L
4 inches W |
45 slots for lengthwise thread |
• Lightweight
• Widest weaving surface |
Jewel Loom |
11-1/4 x 3 inches | Plastic and steel |
10-1/2 inches L
2-3/4 inches W |
25 thread slots |
• Portable
• Longest weaving surface • Lowest price |
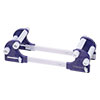
Clover loom |
Adjustable length: 8-1/2 to 11-3/4 inches
4-1/4 inches W |
Plastic steel/iron/aluminum |
Adjustable length: 5 to 8 inches
Selectable width: 2.48 or 2.56 inches |
Two lengthwise thread options: 44 threads slots or 40 threads slots |
• Adjustable weaving length
• 2 sets of lengthwise thread slots • Good thread grip • Thread stoppers (pegs) for easy thread removal • 26-pc set includes needles |
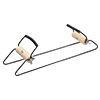
Metal frame loom |
12-1/2 x 2 inches | Metal and wood |
5-3/4 inches L
2-1/2 inches W |
32 thread slots |
• Portable
• Easy to use/Low learning curve • Low price |
The Language of Loomwork
Now that you've selected a loom, let's talk about the tools and materials you'll need to do some bead weaving with it. But before we do that, here's a review of some basic loomwork terms.
Warp and Weft
Warp and weft are two weaving terms steeped in history and tradition. They are the names for the two directions of the thread on the loom. The warp threads are the vertical threads; they run up and down the loom and ate attached first. Weft threads are the horizontal threads, running left to right, which you'll be weaving your beads on.
One easy way to remember which are which is the sayings, "weft and right" and "not too tight, or you'll warp the loom."
Gathering Your Materials
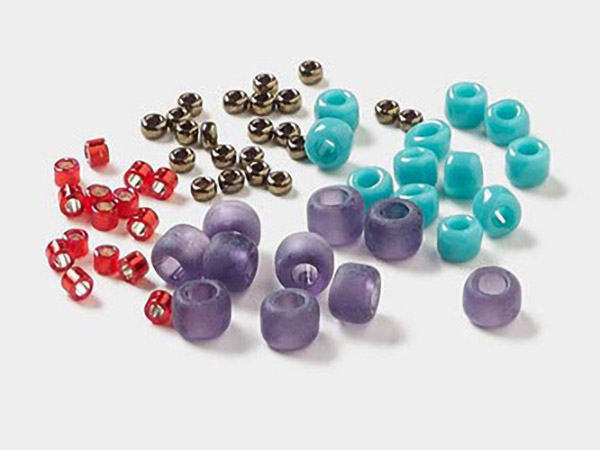
Seed Beads - Seed beads are used quite often with the beading looms because their small size makes it possible to create more intricate patterns over a smaller area. Of course larger beads can be used if the loom allows the warp spacing to be adjusted.
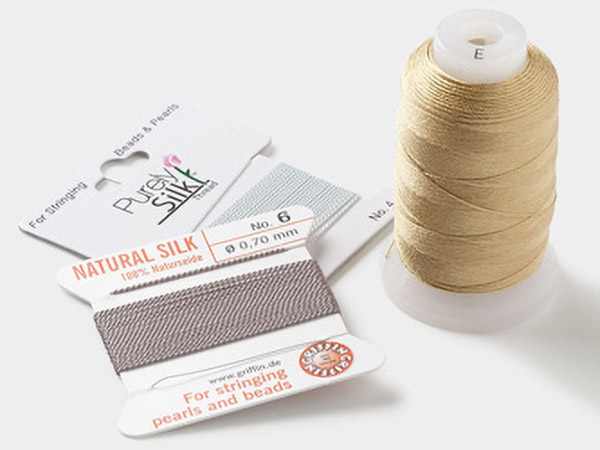
Thread - The size of the seed bead will determine which size thread you will use. Our Seed Bead Sizes and Hole Sizes chart shows what size stringing materials will fit each size of bead.
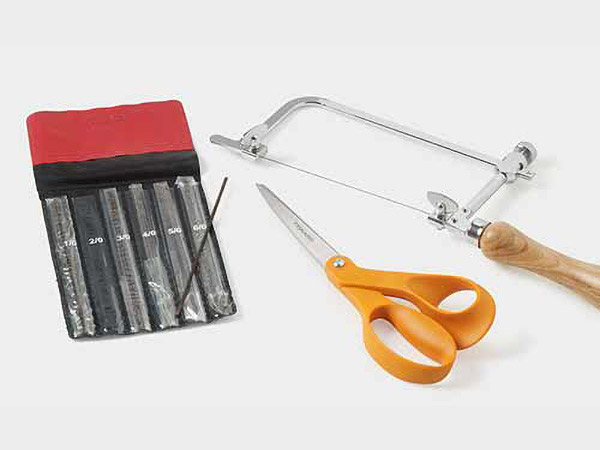
Needles - Any needle that will pass through the beads will do. Some designers prefer a longer needle at least 3 inches long and less flexible. It depends on the width of your piece: long enough to hold the beads of the weft plus extra for the tip and the eye.
Patterns - Seed bead patterns provide a map of how the beads will be laid out on the loom row by row. Woven seed bead patterns can be combined into a larger design.
Seed Bead Loom Kits - Used to make a specific design such as a brooch or bracelet. A beading loom kit typically includes instructions, a stitch chart, beads, thread and pin back. To complete the project, you will also need a beading loom, scissors, ruler, cellophane tape and a beading needle.
Weaving a Seed Bead Design on the Loom
Ready to start? Here's what you need:
- A flat, clear workspace with good lighting. You'll need plenty of room for the loom, the materials and your tools. The loom can take up as much 12-1/2 inches by 5 inches of your workspace—more if you choose a larger loom.
- Your chosen loom.
- Thread - The size of the seed bead will determine which size thread you will use. Our ''Seed Bead Sizes and Hole Sizes'' chart shows what size stringing materials will fit each size of bead.
- Needle - your needle should be able to pass through the beads. You may prefer a longer needle at least 3 inches long and less flexible. It depends on the width of your piece. The needle should be long enough to hold the beads of the weft plus extra for the tip and the eye.
- Seed bead pattern - Seed bead patterns provide a map of how the beads will be laid out on the loom row by row. Woven seed bead patterns can be combined into a larger design.
Here is a brief outline of the loom weaving steps:
- Step 1 - String the warp threads into the individual spaces on the loom
- Step 4 - Thread string onto a needle. Tie the end of the string to the first strand of the warp. String beads on your needle according to the pattern showing how many and what color of bead.
- Step 5 - Place a finger under the beads and press them up between the warp threads. Pull the needle and thread all the way through to the other side, under the warp. While still holding the beads in place, pass the needle back through the beads, being careful to keep the needle above the warp. This secures your line of beads in place by sandwiching the warp between the weft threads.
For more detailed instructions and helpful hints on how to set up your loom, check out these resources:
- "How to Set Up a Beading Loom" how-to video and illustrated instructions
- "How to Use the Versa-Loom™" illustrated instructions
- "How to Weave Beads on a Mirrix Loom" how-to video and instructions
- "Beadalon® Jewel Loom™ Beading Loom Tips" how-to video series
- "How to Assemble the Beading Loom" instructions
What’s Next: Expanding Your Horizons
Once you've mastered your first pattern, challenge yourself with a 25-row design. Experiment with creating your own patterns using printable seed bead graph paper. As you grow in skill, consider upgrading to a larger loom for even more ambitious projects like tapestries.
Embark on this loomwork journey, where each thread weaves not just a pattern, but a story of creativity and inspiration. Happy weaving!
Shop for Your Materials Here:
Have a question regarding this project? Email Customer Service.
Copyright Permissions
All works of authorship (articles, videos, tutorials and other creative works) are from the Fire Mountain Gems and Beads® Collection, and permission to copy is granted for non-commercial educational purposes only. All other reproduction requires written permission. For more information, please email copyrightpermission@firemtn.com.