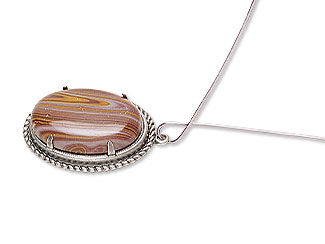
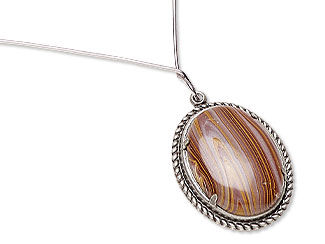
Single-Strand Necklace with Leather Cord, Natural Autumn Hickoryite Oval Cabochon and Antique Silver-Plated Components


Design Idea RF4D
-- Designer --
Patti, Jewelry Designer, Exclusively for Fire Mountain Gems and Beads®
To learn more about Patti Miller, read her jewelry artist success story here.
: : : Materials : : :
Click here to view a full list of materials used in this design.
Please take the creative opportunity to select the products of your choice for this design, offered here at Fire Mountain Gems and Beads. Some materials may not be available or listed.
- Autumn hickoryite, calibrated oval cab natural 30x22mm
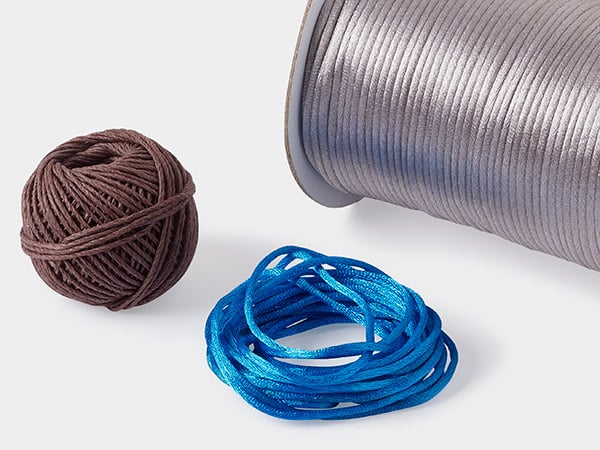
- Cord, leather (dyed), brown, 3mm round
- Crimp end, JBB Findings, antique silver-plated brass, 10x6.5mm tube with swivel, loop and rope trim design, 4mm inside diameter
- Focal, antique silver-plated brass, 35x29mm rope edge oval with 30x22mm oval setting
- Jump ring, antique silver-plated brass, 8mm round, 5.4mm inside diameter, 16 gauge
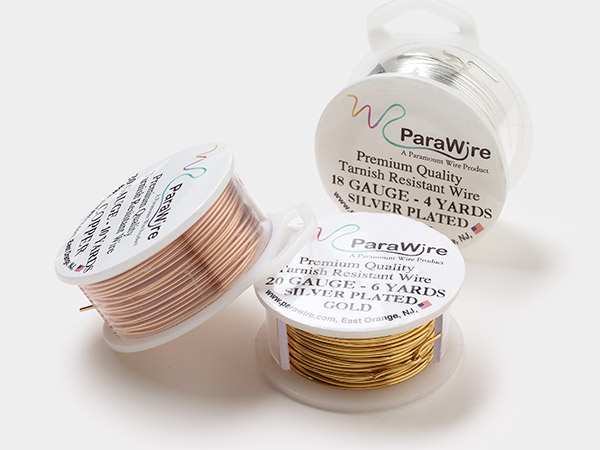
- Wire, ParaWire™, titanium-finished copper, round, 18 gauge
Instructions
Cut one 17-1/2 inch length of 3mm brown leather cord.
Cut one 8-inch length of 18-gauge titanium-finished ParaWire™.
Cut one 10-inch length of 18-gauge titanium-finished ParaWire.
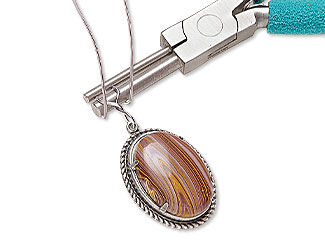
If they are pointing inward at all, use chain-nose pliers to bend the prongs straight upward on a 35x29mm antique silver-plated rope-edge oval focal setting. Drop a 30x22mm autumn hickoryite oval cabochon into the setting.
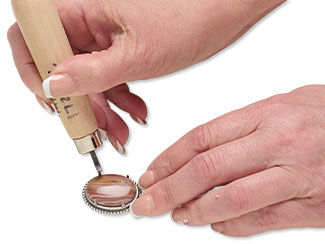
Use a bezel roller to rock each prong about halfway down onto the cabochon. Once all the prongs are partially set, use the bezel roller to fully seat each prong smoothly against the cabochon.
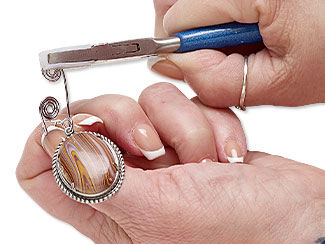
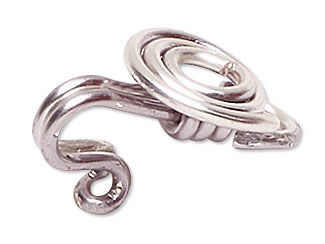
Make a double spiral bail by centering the bottom third of the barrel of round-nose pliers on the center of the 10-inch length of 18-gauge titanium-finished ParaWire. Push both ends around the barrel equally, letting the tails cross, to make a small teardrop loop.
Thread the loop of the cabochon setting onto one end of the 10-inch wire and let it fall into the loop.
Change the orientation of the teardrop loop by using fine chain-nose pliers to grip the teardrop loop above the cabochon's loop. With your thumb and forefinger, grip the tails of the wire just above the juncture where they cross and twist it a quarter turn so the loop is now on the opposite plane of the tails, so when you lay the cabochon on a flat surface the tails also lay flat.
Use the tip of round-nose pliers to grip the base of one tail right at the junction where they twist and, holding that tightly, bring the tail to the center, creating a little bow in the tail near the juncture. Do the same for the opposite tail.
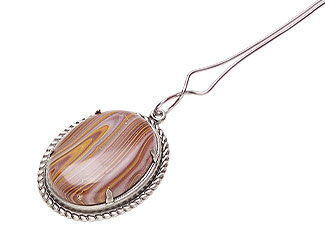
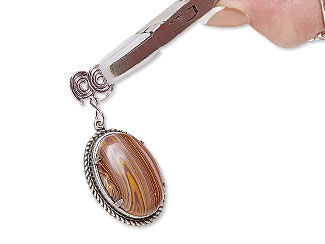
With both tails parallel and pointing upward evenly, grip both tails simultaneously just above the juncture with the large barrel of Wubbers® Designer Mandrel bail-making pliers. Pull one tail around the bail so it makes a circle and ends up pointing straight toward you if you lay the set cabochon on a flat surface. Repeat for the other tail so it ends up on the opposite side of the juncture.
Using the tip of your round-nose pliers, make a partial loop facing upwards away from the cabochon. Cut off the last 2mm of the tail so you end up with a nice, rounded shape. Insert your pliers back into the C shape and use this to make a spiral, rolling it all the way up until it touches the bail. Repeat with the remaining tail.
Using flat nylon-jaw pliers, grip the spiral and turn it inward so the inside edge is at center of the bail. Repeat with the remining spiral.
Make a spiral hook clasp by making a 180-degree bend in the 8-inch length of 18-gauge titanium-finished ParaWire. Make it 1-3/4 inches from one end so the tails end up tightly parallel.
Make an approximately 6mm simple loop at one end of the 8-inch length of ParaWire. About 1/2 inch from the bend in the wire, grip both wires with the small barrel of the Wubbers Designer Mandrel bail-making pliers and make a small hook. Use chain-nose pliers to kick the end of the hook outward a few millimeters.
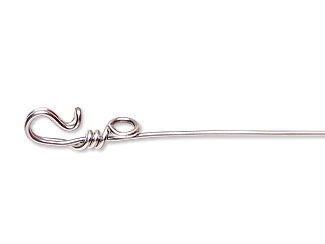
Grip the flat side of the hook in your non-dominant hand using flat nylon-jaw pliers, then, approximately 4mm to 5mm from the simple loop end, wrap the remaining tail twice tightly just above the loop.
Trim the tail to 2-1/2 inches, then make a spiral with the tail. Lay it flat against the outside of the hook using flat nylon-jaw pliers. Adjust the hook so the inside tip of the hook is close but not quite touching the opposite side, so the jump ring that makes up the other half of the clasp will pass though but not easily slip out. Set it aside.
Slide the end of a 17-1/2 inch length of 3mm brown leather cord into a 4mm antique silver-plated swivel tube crimp. Then crimp down the center of the tube using fine chain-nose pliers—halfway on one side, halfway on the other. Repeat for an even crimp.
Attach the simple loop on the hook clasp to the loop on the tube crimp.
Slide the free end of the cord through the double spiral bail.
Slide the remaining end of the cord into a 4mm antique silver-plated swivel tube crimp, then crimp as before.
To complete the clasp, add an 8mm 16-gauge antique silver-plated jump ring to the loop on the tube crimp you just applied.


Copyright Permissions
The pieces featured in the Gallery of Designs are copyrighted designs and are provided for inspiration only. We encourage you to substitute different colors, products and techniques to make the design your own.
All works of authorship (articles, videos, tutorials and other creative works) are from the Fire Mountain Gems and Beads® Collection, and permission to copy is granted for non-commercial educational purposes only. All other reproduction requires written permission. For more information, please email copyrightpermission@firemtn.com.