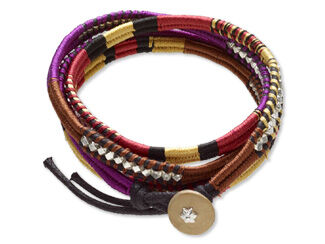
Jewelry-Making Techniques
Bib-Style Necklace and Earring Set with Resin Cabochon, Gemstone Cabochons and Seed Beads
Courtesy of Fashion Magazine
D172
Design by Vera Ugarova
Prisoner of Time Pendant
: : : Materials : : :
-
Bead, amber, drops (K)
-
Bead, copper, flat round (L)
-
Cone, copper, antiqued, 40mm
-
Cabochon, crab in resin, triangular
-
Cabochon, aventurine, 30x40mm oval
-
Cabochon, aventurine, 20x30mm rectangle
-
Seed bead, Czech, transparent brown, size 6 (J)
-
Seed bead, Czech, grated yellow, size 8 (I)
-
Seed bead, Toho, transparent cubic brown with rainbow coating, 4mm (A)
-
Seed bead, Toho, transparent cubic brown with rainbow coating, 1.5mm (B)
-
Seed bead, Toho, gold-lustered transparent pink, size 11 (C)
-
Seed bead, Toho, transparent brown, size 11 (D)
-
Seed bead, Toho, matte light amber, size 11 (E)
-
Seed bead, Toho, brown with golden coating, size 11 (F)
-
Seed bead, Toho, transparent yellow with rainbow coating, size 11 hexagonal (H)
-
Seed bead, Toho, transparent pink with golden coating, size 15 (G)
STEP 1
Picture 1 |
|
Draw your own full-size diagram of the pendant, or photocopy Picture 1, enlarging it to the desired size. Transfer the design to fabric for under backing. Glue the cabochons in the marked places. Let the glue dry. |
STEP 2
Figure 1 |
|
Sew the basic row in D along the perimeter of triangular cabochon (Fig. 1). Repeatedly go through the last bead row, pulling tightly on the thread. |
STEP 3
Figure 3 |
|
Sew the basic row in D along the perimeter of the oval cabochon (Fig. 1). Bead the cabochon in peyote stitch (Fig. 3); the number of the rows depends on the thickness of your cabochon. (The author has made three rows in D, one row in G and one row in C.) Repeatedly go through the last bead row, pulling tightly on the thread. |
STEP 4
Figure 2 |
|
Sew the basic row in D along the perimeter of rectangular cabochon (Fig. 1). Bead the cabochon in B (Fig. 2). Repeatedly go through the last bead row, pulling tightly on the thread. |
STEP 5
Embroider the free space of the pendant in A, C, E, F, H, I and J, using the photograph or the diagram as a guide.
STEP 6
Figure 4
Figure 5 |
|
Trim away all the excess fabric as close to the last bead row as possible. Glue a piece of leather to the back side of the pendant. Let the glue dry. Trim away all the excess leather. Work the basic edge in D (Fig. 4). Work three pendants in B, D, K and copper antiqued cones and attach them to the bottom part of the necklace (see Fig. 5 and the photograph).
Ropes
Bead two herringbone spirals in D (Fig. 6). Attach a clasp. Join the loose ends of the ropes to the pendant, going through L and J, as shown in the photograph. |
Have a question regarding this project?
Email Customer Service.
Copyright Permissions
Permission to copy this instruction sheet is granted for non-commercial educational purposes only. All other reproduction
requires written permission. Please email copyrightpermission@firemtn.com
for more information.