Secrets to Kumihimo Project 1: Simple 4-Strand Braid
Learn the secrets to kumihimo in this beginner-friendly tutorial. We'll show you how to make a simple 4-strand braid, perfect for creating your own stylish bracelet. Whether you're brand new to kumihimo or need a refresher, this step-by-step video will guide you through everything you need to know. Ready to get started? Grab your cord and disk and braid along with us!

Design Idea RC3C
-- Designer --
Elaine, Jewelry Designer, Exclusively for Fire Mountain Gems and Beads®
To learn more about Elaine Young, read her jewelry artist success story here.
: : : Materials : : :
Click here to view a full list of materials used in this design.
Please take the creative opportunity to select the products of your choice for this design, offered here at Fire Mountain Gems and Beads. Some materials may not be available or listed.
- Adhesive, E6000®, adhesive, clear.
- Charm, antique silver-plated "pewter" (zinc-based alloy), 15x11mm double-sided moon with moon and star design
- Clasp, lobster claw, silver-plated brass, 12x7mm with swivel
- Cord end, fold-over, silver-plated steel, 7x6mm, 5.5mm inside diameter
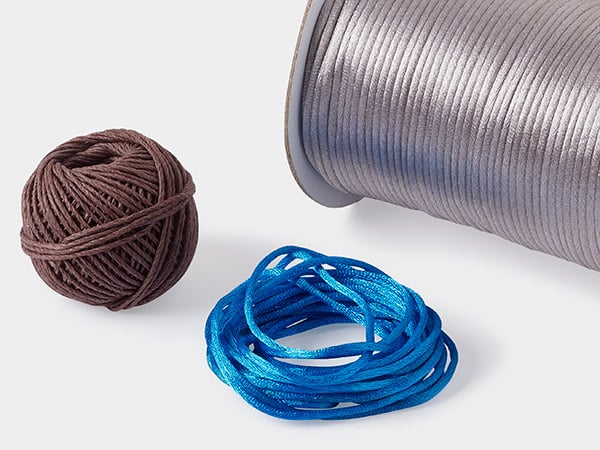
- Cord, Satinique™, nylon and polyester, lime green / green / pink, 2mm regular with vertical stripe
- Cord, Satinique™, satin, black, 2mm
- Jump ring, silver-plated brass, 5.5mm round, 3.5mm inside diameter, 18 gauge
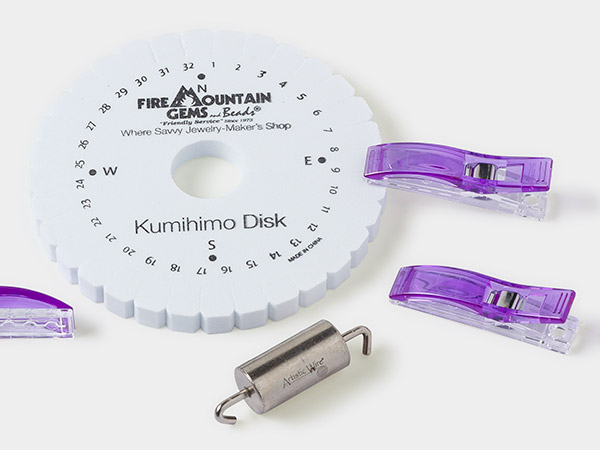
- Kumihimo disk, EVA foam, white and black, 6-inch round and 3/8 inch thick with 1-1/2 inch inside hole and 32 slots
- Wire knitter and kumihimo weight, Artistic Wire®, steel, 2 x 1/2 inches, 50 grams
- Thread, Berkley® FireLine®, gel-spun polyethylene, smoke, 0.13mm diameter 4-fiber braid, 4-pound test
Instructions
Cut two strands of cord to your desired length, keeping in mind that you will need a little extra, as the cord will not be as long once it’s braided. Remember also that the strands will be folded in half. You can use one multicolor cord or two different colors.
Fold each strand in half to create four working ends. Cut a 4-inch length of 4-pound test FireLine® nylon thread, and use it to tie all the folded ends together securely.
Insert the folded ends of the cords into the center hole of the kumihimo disk. Hold the folded ends firmly on the underside of the disk. You can attach weights to the ends to keep them steady. Place the cords into the following slots and make sure they are tightly positioned.
If you are using a single color of cord:
- Top: #32
- Bottom: #16
- Right: #8
- Left: #24
If you are using two colors of cord:
First color:
- Top: #32
- Bottom: #16
Second color:
- Right: #8
- Left: #24
Position the disc so that North is at the top.
Always start each cycle with the bottom left strand.
- Move 1: Move the strand from the bottom (#16), up to the top (#31). There should now be two strands at the top.
- Move 2: Move the strand from the top right (#32), down to the bottom (#16).
- Move 3: Move the strand from the right slot (#8), to the left slot (#25).
- Move 4: Move the strand from the left slot (#24), to the right slot (#8).
- Move 5: Move the strand from slot #25 back to slot #24.
- Move 6: Move the strand from slot #31 back to slot #32.
You should be back at the starting point.
Repeat the pattern as follows:
- Bottom up
- Top down
- Right to leftLeft to right
Then, reset the disk to the starting point. Continue braiding until you reach the desired braid length.
Cut a 4-inch length of 4-pound test FireLine thread and tie an overhand knot, followed by a surgeon’s knot. Wrap the Fireline thread around the cords about 10 times, then tie an overhand knot, followed by a surgeon’s knot, and then another overhand knot. Trim the excess FireLine thread. Apply E6000® adhesive to the cord ends.
Finish both ends of the bracelet with a 7x6mm fold-over cord end and crimp tightly.
Attach a 5.5mm jump ring to the loop on the ends of each cord end. Add lobster claw clasp to the jump ring at one end of the bracelet and a moon charm to the jump ring at the other end of the bracelet.
Tip: If you need to pause, stop when you have three strands at the top. This makes it easier to remember where you left off.
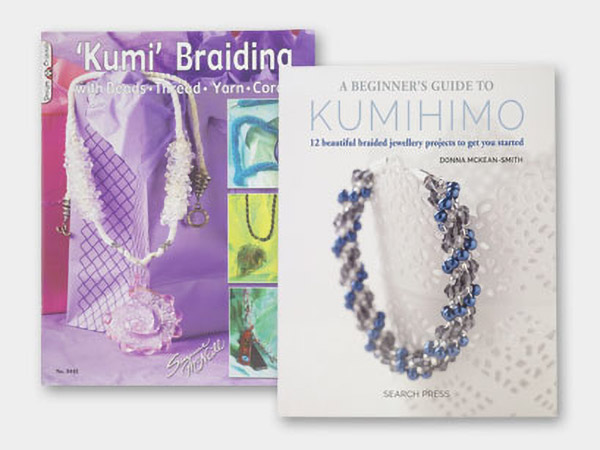
For more information about kumihimo braiding, check out the information in “How to Make a Spiral Kumihimo Braid” and “Basics to Kumihimo.”
Shop for Your Materials Here:
Have a question regarding this project? Email Customer Service.
Copyright Permissions
All works of authorship (articles, videos, tutorials and other creative works) are from the Fire Mountain Gems and Beads® Collection, and permission to copy is granted for non-commercial educational purposes only. All other reproduction requires written permission. For more information, please email copyrightpermission@firemtn.com.