Secrets to Kumihimo Project 7: 12-Strand Heart Friendship Braid
Discover how to make a Kumihimo 12-strand braid friendship heart bracelet in this step-by-step tutorial, part of the Secrets to Kumihimo series. Project 7 of 9 focuses on creating a beautiful, intricate braid that forms into a heart-inspired bracelet—perfect for sharing with a friend or keeping as a personal treasure.


Design Idea RC3G
-- Designer --
Elaine, Jewelry Designer, Exclusively for Fire Mountain Gems and Beads®
To learn more about Elaine Young, read her jewelry artist success story here.
: : : Materials : : :
Click here to view a full list of materials used in this design.
Please take the creative opportunity to select the products of your choice for this design, offered here at Fire Mountain Gems and Beads. Some materials may not be available or listed.
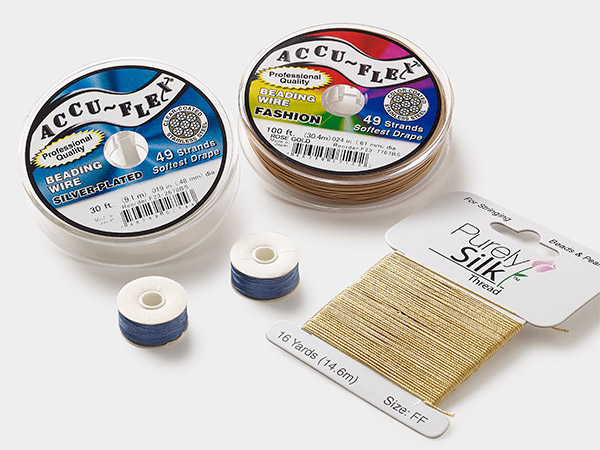
- Satinique™ 1mm maroon cord
- Satinique™ 1mm white cord
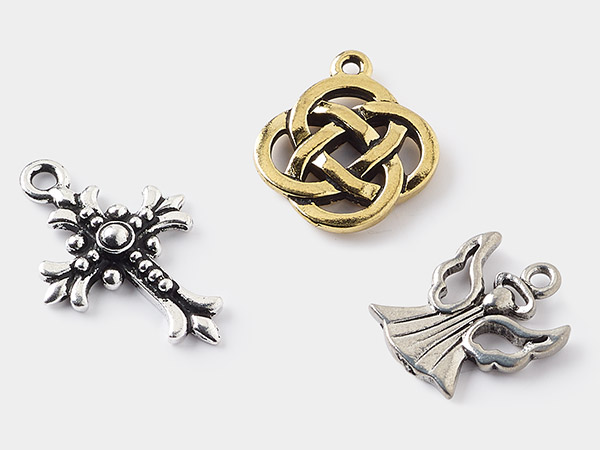
- Antique silver-plated “pewter” double heart charm
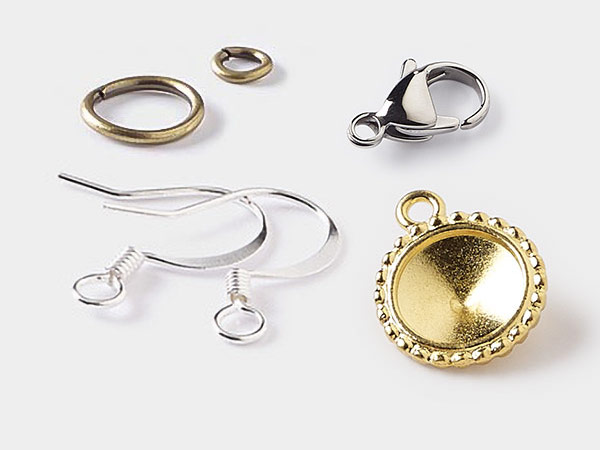
- Silver-plated “pewter” lobster claw clasp
- Silver-finished “pewter” 8x8mm glue-in cord end
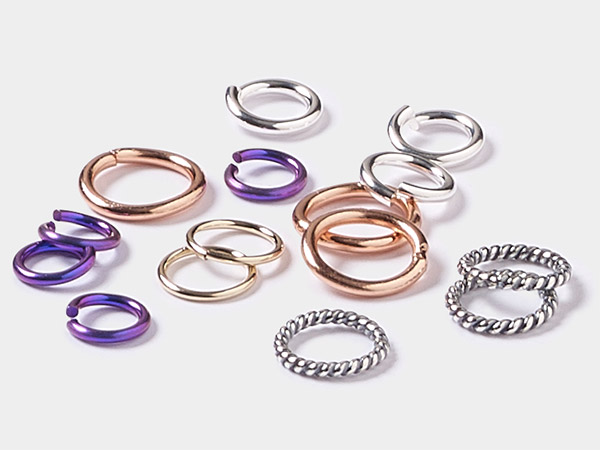
- Silver-plated brass 6mm 18-gauge round jump ring
- Kumihimo plate, EVA foam, white and black, 6-inch single-sided square with 2 x 1-1/4 inch inside hole and 32 slots, 3/8 inch thick
- Huggy Spool® weight, brass and stainless steel, 2-1/4 x 3/4 inch hanger with hook end and (4) 20x11.5mm weights with 6mm hole, 25 grams
- Huggy Spool®, soft plastic, clear, 2-1/2 inch round with 3/4 inch hole
- Adhesive, Quick Hold®, clear
Instructions
Cut six 48-inch lengths of cord—five of the background color and two of the heart color.
Tie the strands of cord together in the middle with an overhand knot. Thread the knot through the center hole of a square kumihimo plate and attach a weight below it.
Arrange the cords on the kumihimo plate as follows:
- Background color in Top 5, 6, 7 and 8
- Background color in Right B and C
- Background color in Left B and C
- Background color in Bottom 5 and 8
- Heart color in Bottom 6 and 7
This pattern follows 12-strand flat braid with specific strand placements to form heart shapes. Move the cords as follows:
- Top 6 to Right D
- Top 7 to Left D
- Bottom 6 to Right A
- Bottom 7 to Left A
- Top 5 to Top 6
- Top 8 to Top 7
- Bottom 5 to Bottom 6
- Bottom 8 to Bottom 7
- Right B to Bottom 8
- Right C to Top 8
- Left B to Bottom 5
- Left C to Top 5
- Right A to Right B
- Right D to Right C
- Left A to Left B
- Left D to Left C
Continue moving strands in the same order. After every full rotation, the heart pattern will start forming.
Tip: Keep consistent tension by pulling firmly after each move.
Tip: Adjust heart color strands if they shift, ensuring they remain aligned to form the heart shape.
Tip: Experiment with heart size by using different thicknesses of cords or varying the spacing of heart strands.
When the desired length is reached, tie a knot. Apply Quick Hold® clear adhesive to the ends and let them dry.
Trim excess cord. Add the cord ends, charm and clasp.
Shop for Your Materials Here:
Have a question regarding this project? Email Customer Service.
Copyright Permissions
All works of authorship (articles, videos, tutorials and other creative works) are from the Fire Mountain Gems and Beads® Collection, and permission to copy is granted for non-commercial educational purposes only. All other reproduction requires written permission. For more information, please email copyrightpermission@firemtn.com.